How to Create Filetrip Uploader
To create a new Filetrip Uploader, go to Filetrip menu and click over “Add New Uploader”. Afterward a new creation page will open for you to allow you to name and configure your uploader instance with variant set of options.
By following this process you can create infinite number of Filetrip Uploader with different customization to meet your business needs. For example, you can destine one uploader to forward uploaded files to Dropbox and FTP with configured folder destinations; whereas, you can destine another Filetrip Uploader to transfer your files to Google Drive with configurable folder destination.
With the following set of options, you will have the freedom of configuring multiple uploaders with different behaviors and conditions.
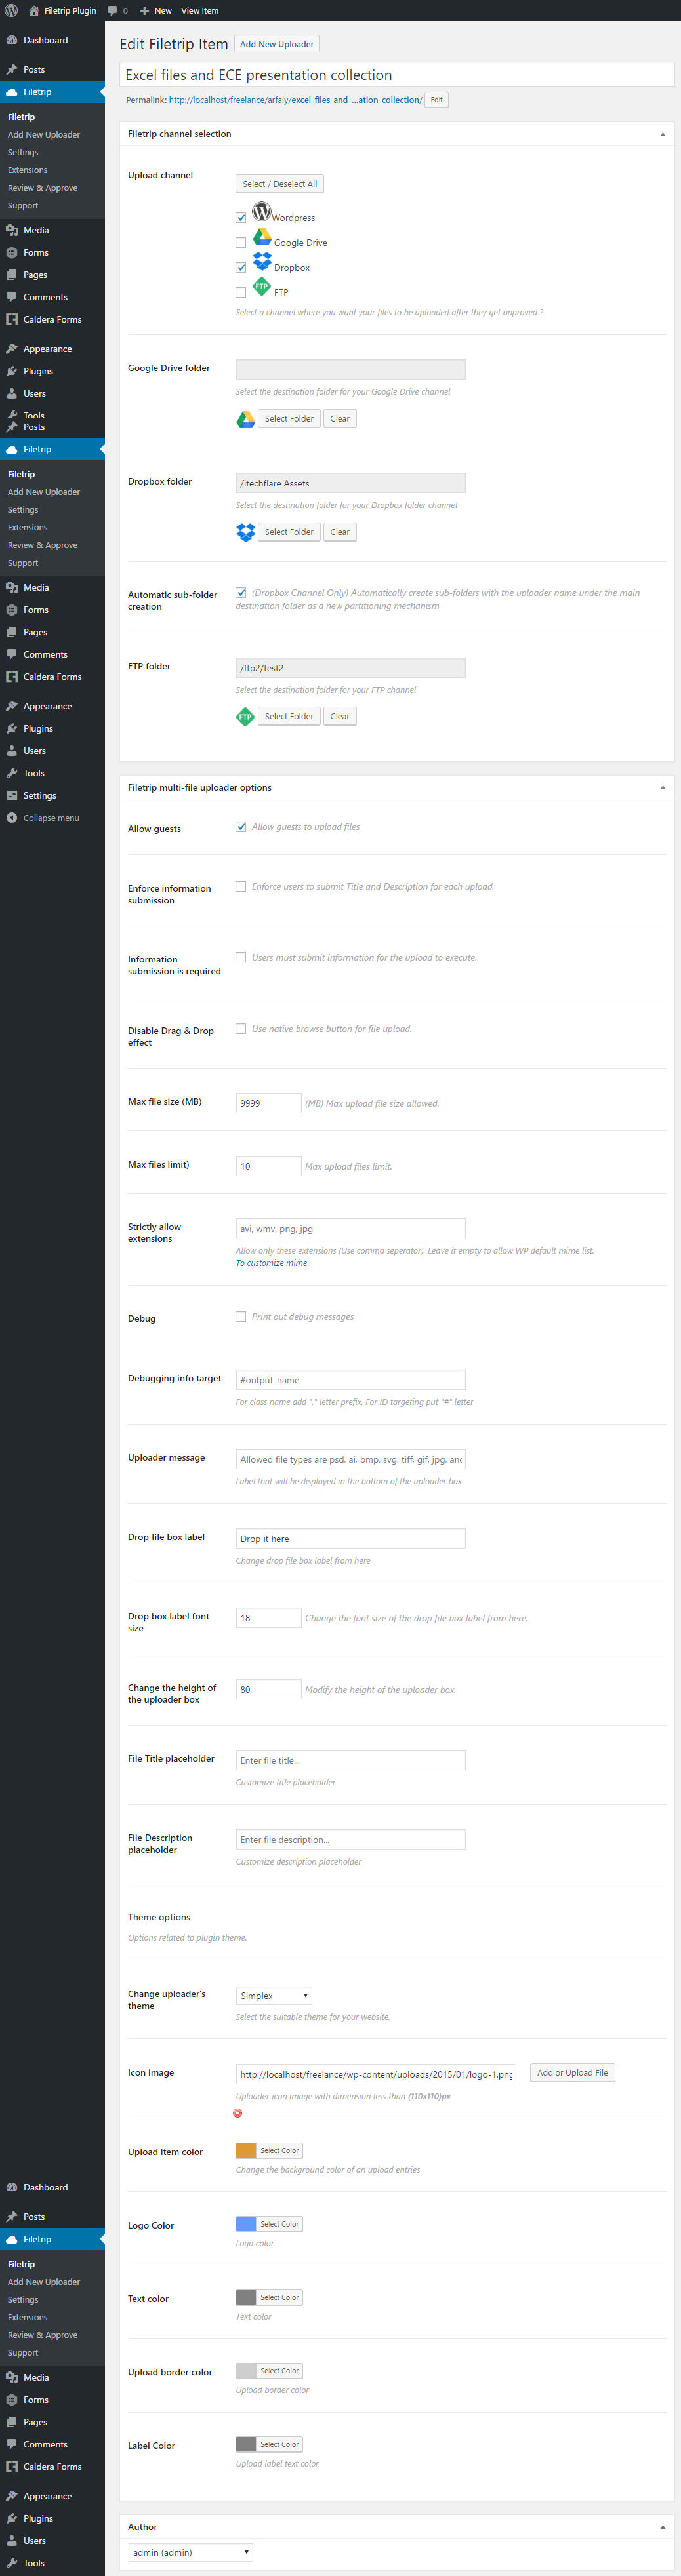
Filetrip Uploader options
| Option | Default | Description |
|---|---|---|
| Upload channels | empty |
Here is where you need to check the channels that you would like the files been uploaded using this specific uploader to be transmitted to, either by bulk approve or by single approval in (Menu -> Media -> Filetrip manage upload) section |
| Dropbox folder | empty |
After activating Dropbox you can use this field to define the destination Dropbox folder for digital files uploaded using this specific Filetrip uploader. |
| Automatic sub-folder creation | empty |
After activating Dropbox you can use this checkbox to create sub-folders automatically |
| Google Drive folder | empty |
After activating Google Drive you can use this field to define the destination Google Drive folder for digital files uploaded using this specific Filetrip uploader. |
| Amazon S3 folder | empty |
After activating Amazon S3 you can use this field to define the destination Amazon S3 folder for digital files uploaded using this specific Filetrip uploader. |
| Generate shared Link | '' |
Whatever channel you select will be used as base links with form & email attachment submissions. |
| Allow website guests to upload files | false |
By checking this box, visitors will be authorized to upload digital files in whatever instance you created. |
| Enforce information submission | false |
Force user to send Title and Description for every file he uploads |
| Information submission is required | false |
Users must submit information for the upload to execute. |
| Disable Drag & Drop effect | false |
Checking this option will remove drag and drop effect, and convert it into regular HTML multi-upload button |
| Disable file preview | false |
Disable file preview feature |
| Max file size (MB) | '10 MB' |
Using this option you can define the maximum size limit of a file. |
| Max file upload limit | '10' |
This option allow you to control how many uploads the users can do for every single session. |
| Strictly allow extensions | '' |
Allow only entered extensions (Use comma seperator). Leave it empty to allow WP default mime list. |
| Debug | false |
Enable debugging for trouble-shooting. |
| Debugging info target | '' |
Only works if Debug is enabled. Target HTML element, for class name add “.” letter prefix. For ID based targeting put “#” letter. |
| Uploader message | '' |
Direction for users that will be displayed in the bottom of the uploader box |
| Drop file box label | '' |
Change drop file box label from here |
| Drop box label font size | 26 |
Change the font size of the drop file box label from here. |
| Change the height of the uploader box | 100 |
Modify the height of the uploader box. |
| File Title placeholder | '' |
Only works with enforce submission option being enabled. Customize title placeholder |
| File Description placeholder | '' |
Only works with enforce submission option being enabled. Customize description placeholder. |
| Theme Options | 'section' |
Options related to plugin theme. |