In some online courses as the “Deep Learning” course provided by Udacity, it is recommended to install TensorFlow and maybe other learning software based materials using Docker image as a pre-configured environment for fast, and less messy way to start coding your assignments. Thus, In this article we will try to break some of the stones that hinder beginners from swiftly installing TensorFlow (Deep Learning tool) in their Window machines.
Let’s start first by introducing the new revolutionary opensource machine learning tool (TensorFlow), which is developed by Google Brain team to help you (Developers) to conduct Machine Learning, Deep Neural Network and Deep Belief Network researches and applications.
What is TensorFlow
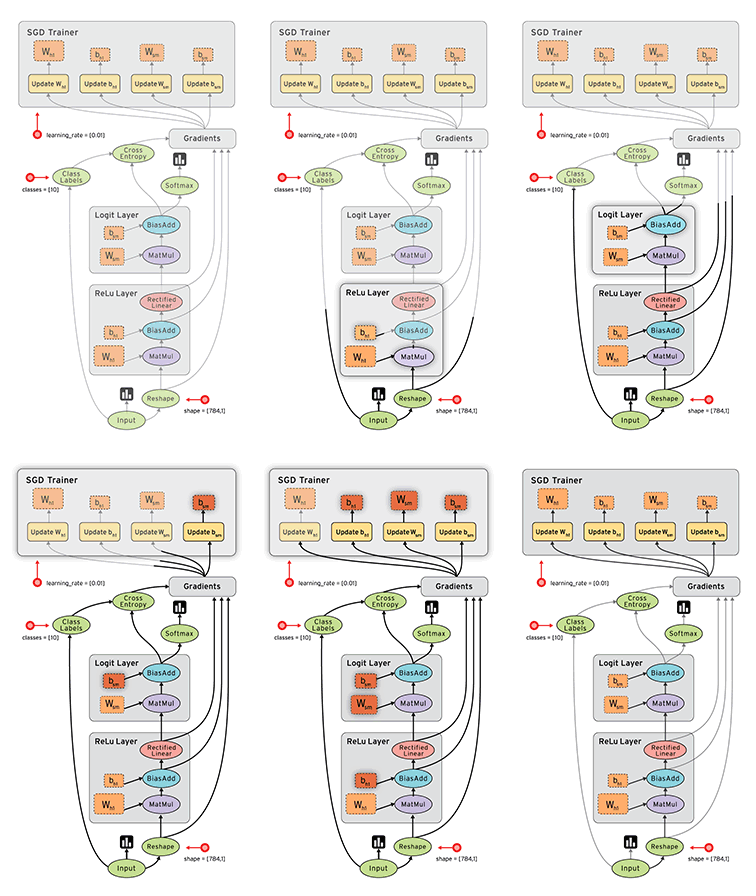
TensorFlow™ is an open source software library for numerical computation using data flow graphs. Nodes in the graph represent mathematical operations, while the graph edges represent the multidimensional data arrays (tensors) communicated between them. The flexible architecture allows you to deploy computation to one or more CPUs or GPUs in a desktop, server, or mobile device with a single API. TensorFlow was originally developed by researchers and engineers working on the Google Brain Team within Google’s Machine Intelligence research organization for the purposes of conducting machine learning and deep neural networks research, but the system is general enough to be applicable in a wide variety of other domains as well.
TensorFlow as an API
TensorFlow library is originally developed for C++ and then it has been wrapped to work as a module for Python:
Most of engineers who read about Neural Network and Connectionist Modeling know that the process of training these models is computationally expensive, however with the fast & considerably cheap GPU’s available today, training deep network becomes more affordable than ever.. “Thanks to Gamers :)”
And what is good about TensorFlow is that it has been optimized to work over CPU’s or GPU’s, and it is up to you to choose your target.
Note: You will have to go with self-installation to allow GPU utilization for TensorFlow.
Ok, what we are going to do now ?
In this article we will focus on how to work with TensorFlow Python module using IPython NoteBook. And to do that with minimal effort, we will install Docker Toolbox and run TensorFlow image that has the stack we need.
The reason of choosing Docker Toolbox is to simplify the installation and configuration process for us, so we are going to invest our time to install docker once and save ourselves countless number of hours in the future installing frameworks and complex web applications, such as:
- JBoss-stack
- IoT servers (MQTT, COAP, etc)
- CMS, ERP, eCommerce, and CRM solutions.
Not to mention other development flow, deployment, cloud, and operational advantages that Docker can bring to any single or cluster based computer.
Again, our target is to install a ready Docker image called “tensorflow-jupyter“.
Let’s get into Docker installation process for Windows
1-Installing Docker Toolbox for Windows requires x64 machine (64bit):
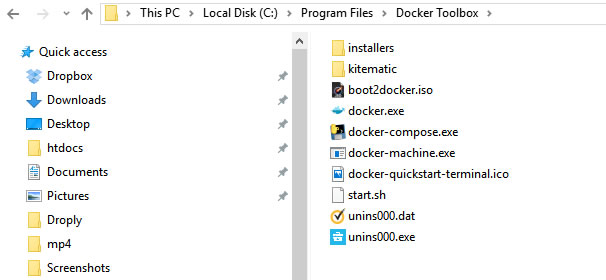
- Go to Docker website and download Docker Toolbox for windows and install it.
- Note that you will need VirtualBox to be installed, and the docker toolbox will take care of that automatically, so you don’t have to worry about installing it.
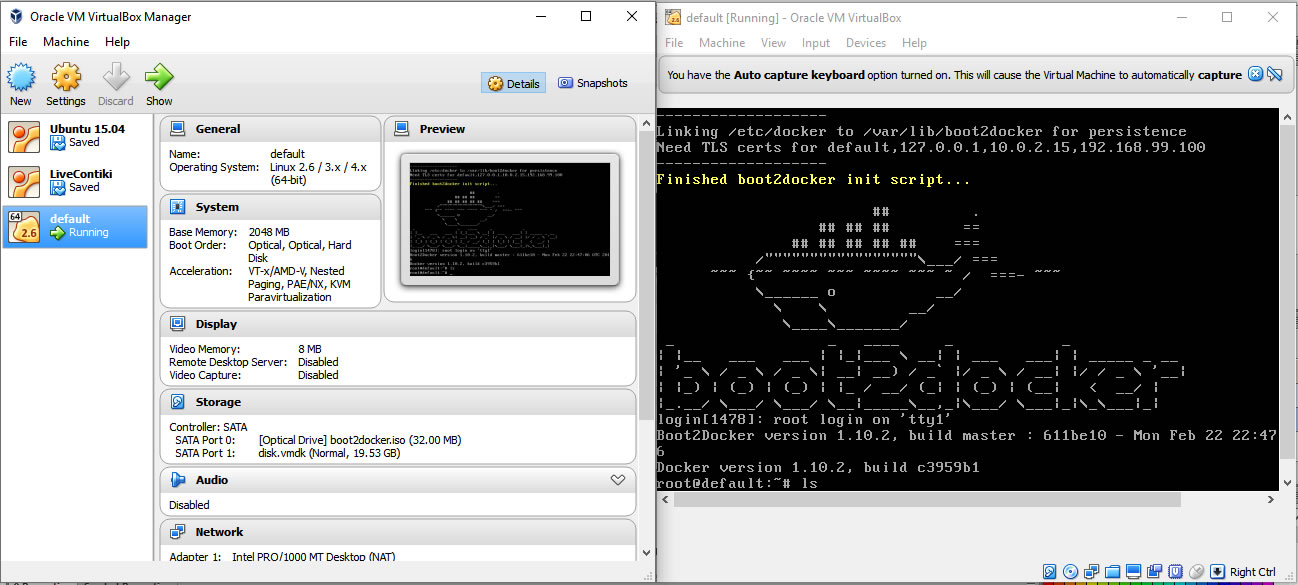
- After you complete the installation of Docker Toolbox you should get Docker Deamon VM inside of your VirtualBox as shown in Figure (2); and, you need to make sure docker2loader or the deamon is working in the background.
- Now Docker deamon should be actually working as a virtual instance, and at the same time it is working as a Windows Service listening on the port (2376).
- Login to docker using your account (You must signup to be able to fetch public images later), you can use the following command to login:
$ docker login
- We are almost done, as currently we can open either “Kitematic (Alpha)” or command prompt to start installing docker images; but not until we do further environment configuration that should permanently fix your Docker Deamon default IP address in your system. And without pre-configuring the IP Address of Docker Deamon will probably toss-out something similar to the following error:
$ docker images
An error occurred trying to connect: Get https://127.0.0.1:2376/v1.22/images/json: dial tcp 127.0.0.1:2376: connectex: No connection could be made because the target machine actively refused it.
This error has been generated because the IP address of the Docker Deamon has been configured yet, and to do so we need to create & update the following Environment Variables in our user local variable section:
- DOCKER_CERT_PATH: C:\Users\{username}\.docker\machine\machines\default
- DOCKER_HOST: tcp://{xxx.xxx.xxx.xxx}:2376
- DOCKER_MACHINE_NAME: default
- DOCKER_TLS_VERIFY: 0
- DOCKER_TOOLBOX_INSTALL_PATH: C:\Program Files\Docker Toolbox
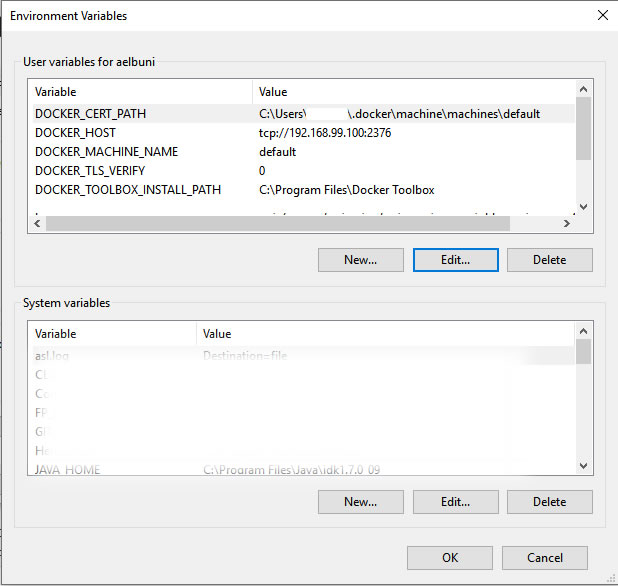
- To get the IP address and the name of your Docker Deamon, you can open a windows command prompt (CMD) and enter the following command to check if your Docker Deamon has got an IP address from the virtual DHCP or not, if not? Then try to go to Virtual Box and reset the Docker VM instance.
$ docker-machine ls
NAME      ACTIVE   DRIVER       STATE     URL                          DOCKER
default   *        virtualbox   Running   tcp://192.168.99.100:2376    v1.10.2
Here you are calling the (docker-machine.exe) script to simplify the job of identifying the IP address of the running docker deamons. Now you can copy the information you get from here into the previous step.
- As an alternative method to get the IP address of Docker Deamon, you can always access the VM instance and use “ifconfig” command.
root@default:~# ifconfig
Install TensorFlow image as a docker image and run it in your local machine
By reaching into this stage, things will become much easier. Your Docker Virtual Environment should be ready now for installing complicated web application stacks with a single line of command, which again will save you hours if not days of configuration and setup hassles.
Here is some useful commands that you can use in your Windows command prompt:
$ docker images
$ docker run <image-name>   --> This will download & install an image
$ docker ps                 --> Display current running containers (Processes)
$ docker ps -a              --> Display hidden stopped containers (Processes)
$ docker rm <container-id>  --> Remove container
$ docker rmi <container-id> --> Remove existing image
$ docker exec <container-id> <linux-command> --> It will execute POSIX command inside of targeted container
Actually these are few common commands and terminology; nevertheless, I cannot really cover Docker fundamentals here, but I recommend you to go and read “Understand images & containers” , and start play with the commands to familiarize yourself with them.
Now going back to the main subject
Here is the single command that will download and install the TensorFlow stack for you:
$ docker run -p 8080:8888 tensorflow-jupyter
For more TensorFlow images, you can check: “TensorFlow Official Images”
Note that we have added port mapping attribute, and without it you cannot access the IPython Notebook. Essentially, with the purpose of the port mapping attribute we added, is to expose the container’s web application (Jupyter) to the Docker Deamon from port 8888 which is the default IPython Notebook port and telling the deamon to interface it to us using port 8080. Therfore, now we can access Jupyter using the IP address of the deamon, which in my case (http://192.168.99.100:8080). And there you have it, now you can create new Notebook and start developing.
Are you not a big fan of command line ?
If you feel that command line interface is a daunting job, you can do everything we explained after getting your environment variables set using “Kitematic (Alpha)“.
Conclusion
By the end of this article you should have setup your Docker Virtual Environment, and at the same time you had the necessary foundation tool to install as many TensorFlow images as you want; however, we have used the publicly available “tensorflow-jupyter” as a starter.
In our next article we will dive deep into TensorFlow library, and try to provide a hands-on experiment to build and train a Neural Network Model to classify characters, using Data Flow model shown in the next image.

